Start to Code ESP32 using Arduino IDE
When I first picked up the ESP32, I was curious about how simple it would be to start coding it. Most of us are already familiar with Arduino boards and Arduino IDE, and the good thing is, we can use the same Arduino IDE to code and program ESP32 development board. That means we don’t need to learn a completely new environment at the beginning. Just a few steps, and we are ready to blink LEDs or build IoT projects with Wi-Fi and Bluetooth feature of ESP32 microcontroller.
In this Article, let me guide you through the complete process for Start to Code ESP32 using Arduino IDE Step by step. Our flow way is, Installing required software and board configuration, and a simple example to get your first code running.
What is ESP32?
You may ask what is ESP32? here is the simple answer, ESP32 is a powerful microcontroller from Espressif and it has,
- Dual Core processor (faster than Uno)
- Built in Wi-Fi and Bluetooth (most wanted features for microcontroller nowadays)
- Multiple ADC, DAC, PWM pins
- Multiple low power modes (Suitable for Battery powered device)
- Affordable price.
These features makes ESP32 Microcontroller an ideal choice for IoT, Automation, Hobby projects, and remote devices. I think, I got it too late but then I remembered “there is no late in learning”, coming to the point, Compared to Arduino Uno or Nano this ESP32 microcontroller has way more features in the small package. Another thing there are different pin size development boards of ESP32 are available in the eCommerce site and local stores.
Step 1 : Install Arduino IDE
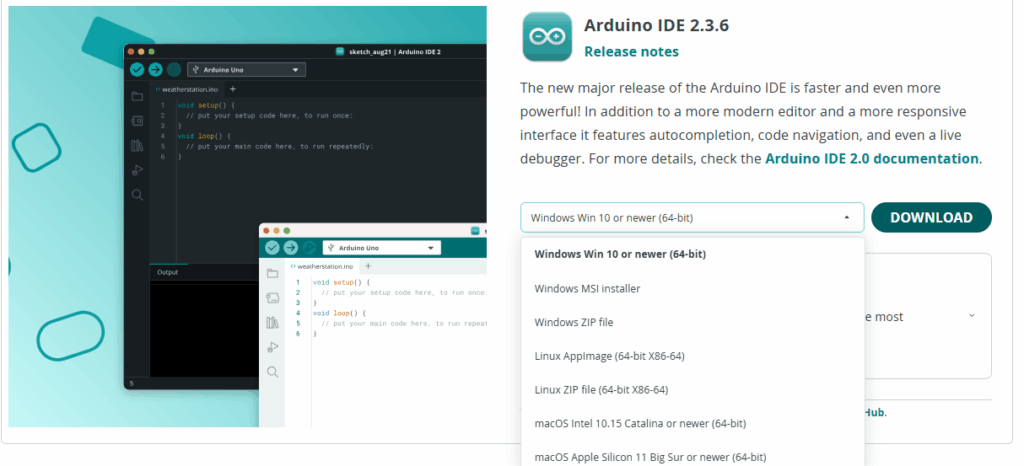
If you don’t already have Arduino IDE then download the latest version of Arduino IDE from the link https://www.arduino.cc/en/software/#ide. Once installed, open Arduino IDE. By default, it supports Arduino boards like Uno, Nano, Mega, but not ESP32. So, we need to add ESP32 board support manually.
Step 2 : Add ESP32 Board URL
Just Open Arduino IDE software and then Go to File → Preferences. In the “Additional Board Manager URLs” field, paste this URL: https://dl.espressif.com/dl/package_esp32_index.json
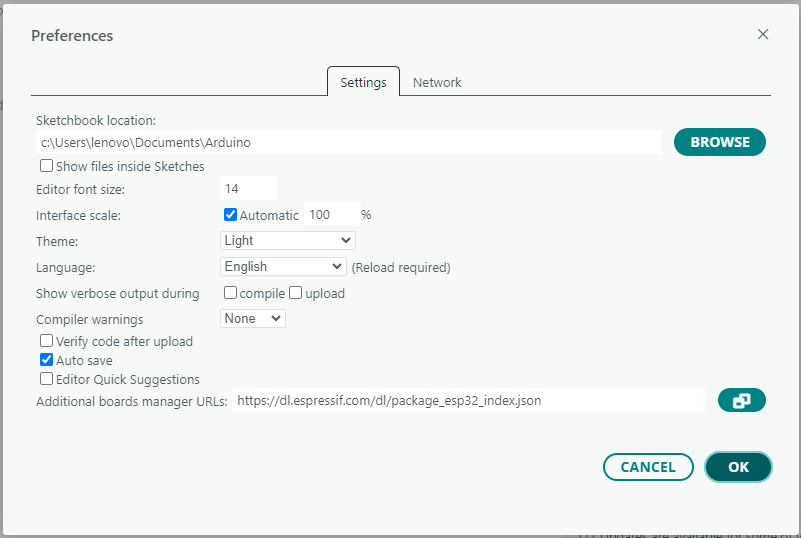
This step tells Arduino IDE where to download the ESP32 microcontroller board package.
Step 3 : Install ESP32 Board Package
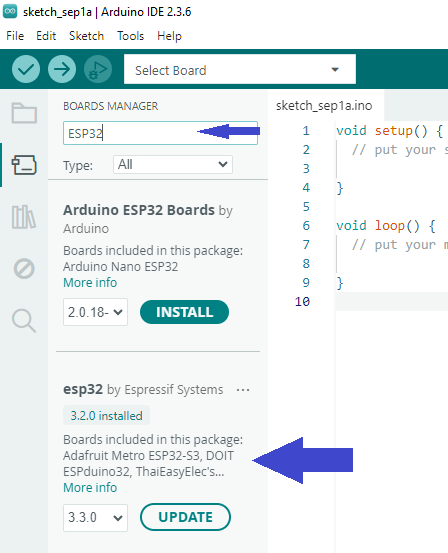
In Arduino IDE go to Tools → Board → Board Manager. In the search bar just type ESP32 then you will see “esp32 by Espressif Systems.” then Click it to Install. It will take a few minutes depending on your internet speed. Once installed then ESP32 boards will be available inside Arduino IDE ready to select and code.
Step 4 : Connect ESP32 Board to your Computer
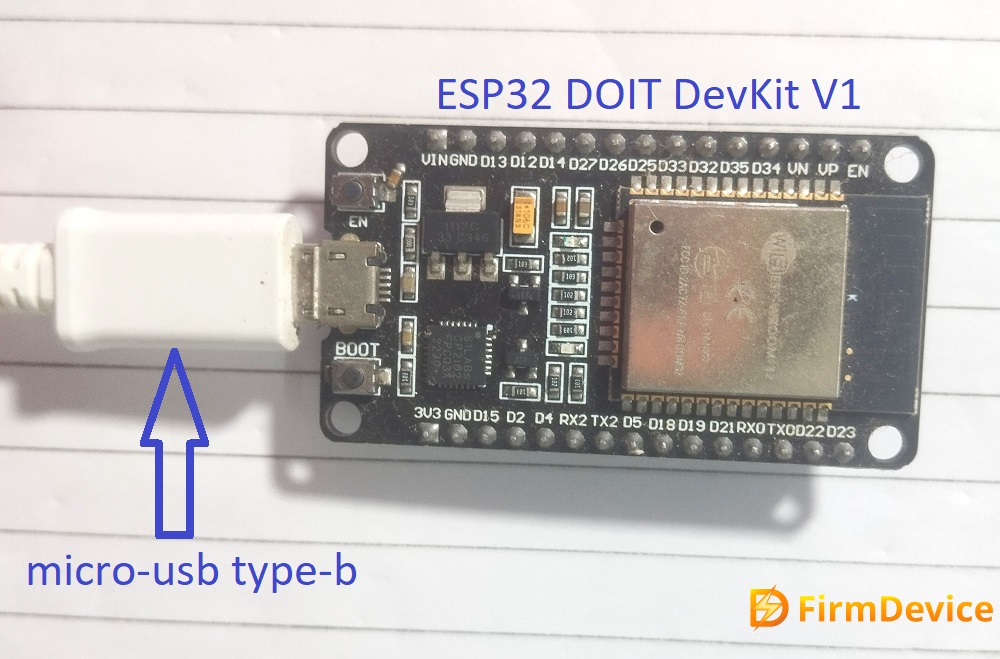
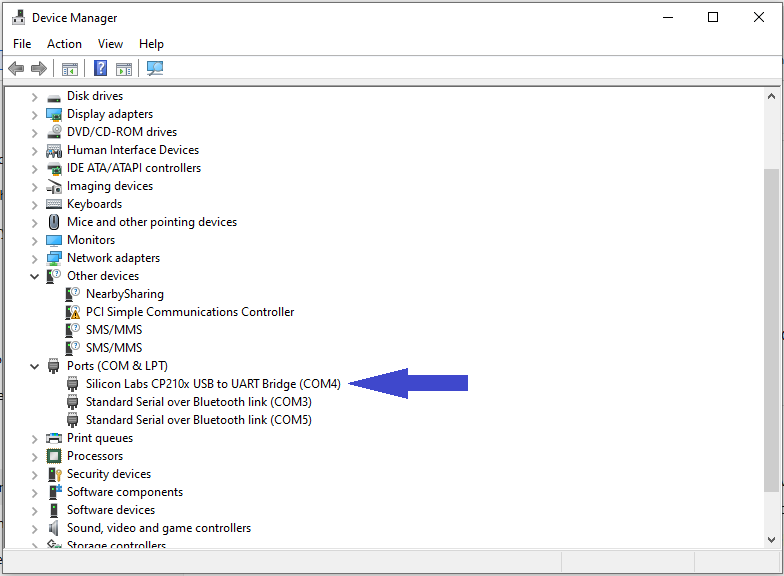
Plug your ESP32 development board (here we used ESP32 DOIT DevKit V1) into your computer using a USB cable. Identify the Port Number in device manger of your computer (here we got COM4), how I know its belongs to ESP32, by looking at the UART bridge name.
In the Arduino IDE, check under Tools → Port and select the correct COM port. In the Latest IDE you can directly select the board and its port.
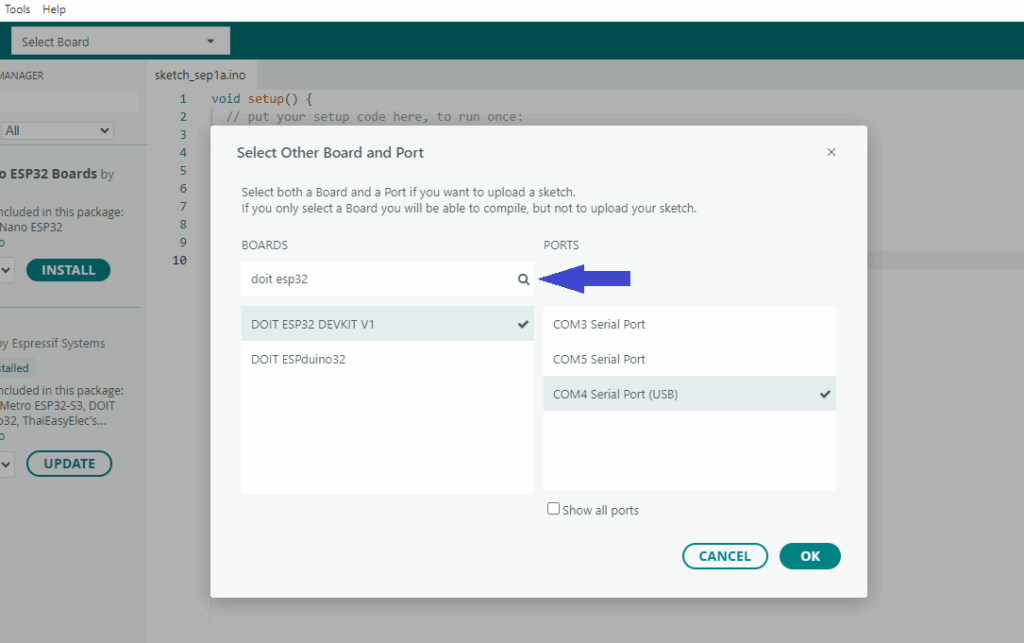
Select ESP32 Dev Module or the specific board you are using. Just search to get your board name and select.
Step 5 : First Program – Blink LED
Just like with Arduino Uno or other Arduino boards, we just test it with a LED blink code. ESP32 boards usually have a built in LED on GPIO 2, so that the first program is usually blinking an LED.
//Code from firmdevice.com
//Start to Code ESP32 using Arduino IDE

void setup() {
  pinMode(2, OUTPUT);   // GPIO2 connected to onboard LED
}

void loop() {
  digitalWrite(2, HIGH);  // Turn LED ON
  delay(1000);            // Wait 1 second
  digitalWrite(2, LOW);   // Turn LED OFF
  delay(1000);            // Wait 1 second
}
Uploading first code to ESP32 board from Arduino IDE, then check the board, on board LED must blink now.
Step 6 : Serial Monitor Test
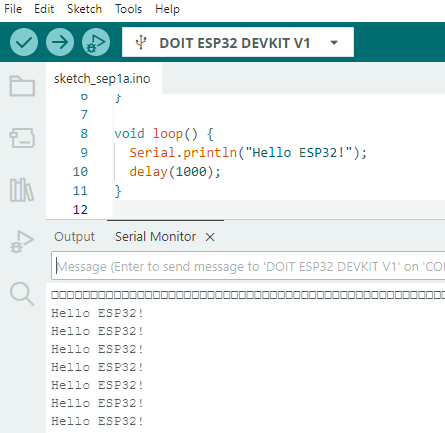
Next important test is checking serial communication between ESP32 board and computer. Use the following code to conduct test.
//Test Code from firmdevice.com
//Start to Code ESP32 using Arduino IDE

void setup() {
  Serial.begin(115200); // Start serial communication
}

void loop() {
  Serial.println("Hello ESP32!");
  delay(1000);
}
After uploading the code successfully, just Open Tools → Serial Monitor in Arduino IDE. You should see “Hello ESP32!” printed every second in the serial monitor.
Now you are ready to code ESP32 with Arduino IDE!
Troubleshooting Tips
- If upload fails in Arduino IDE then press and hold the BOOT button on ESP32 development board while uploading.
- Always check the correct COM port is selected befor uploading the code.
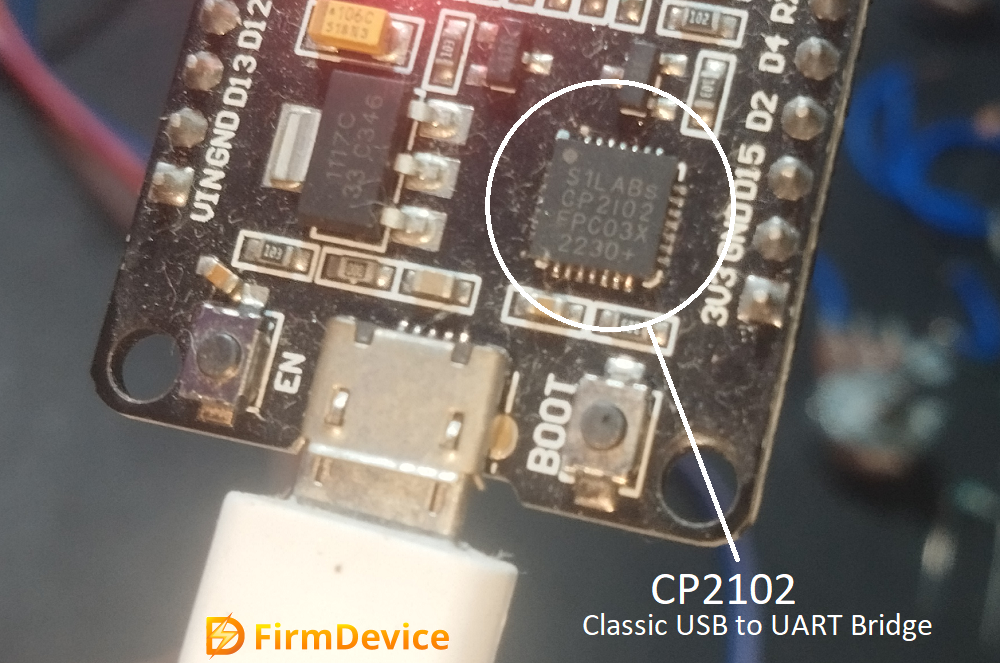
- Make sure you installed the correct driver for your ESP32 board’s USB-to-Serial chip like CP2102 or CH340. To know exact chip name just look at the USB serial bridge IC in ESP32 board.


Comments (0)
Log in to leave a comment.
No comments yet. Be the first!