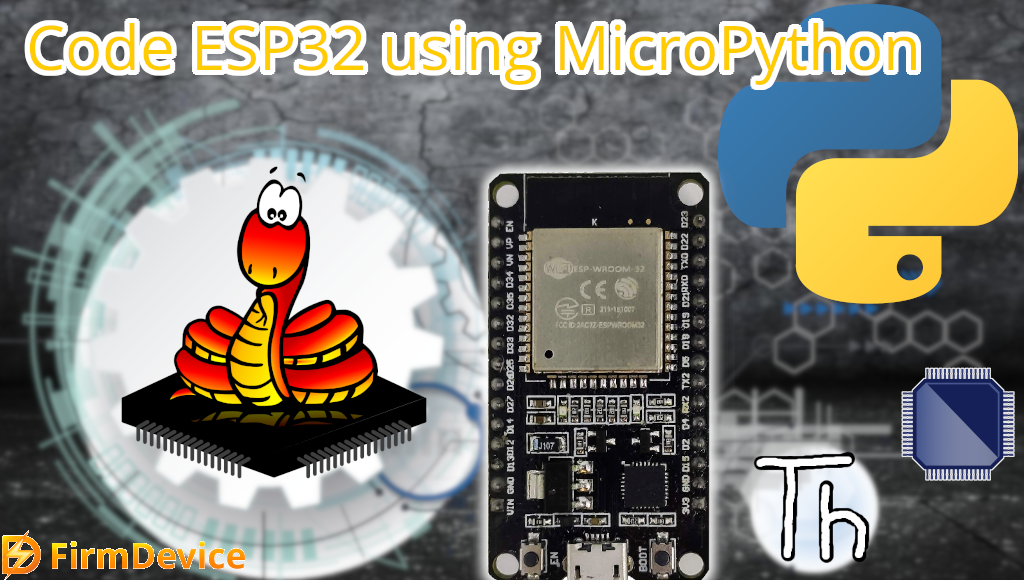
We know that ESP32 Microcontroller roaming as a hero of basic IoT applications. Reason for that is, ESP32 have Dual core processor, built in Wi-Fi, Bluetooth and enough GPIO pins to make you feel like a kid in a candy store. More than that ESP32 Microcontroller can be programmed by MicroPython language. MicroPython runs smoothly on microcontrollers. Now you can stop wrestling with complex C, C++ or the slow Arduino IDE by using MicroPython to code microcontrollers. Let’s learn about coding ESP32 using MicroPython.
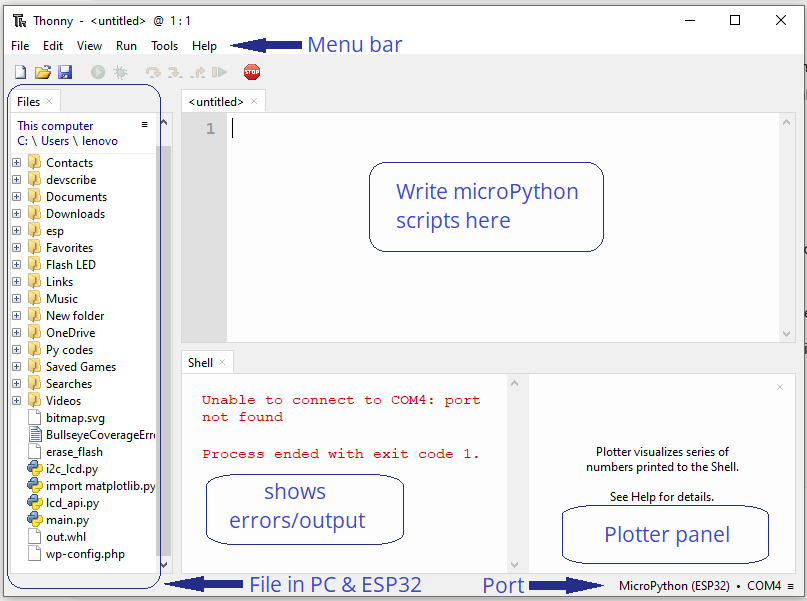
Here you can learn to setting up your ESP32 with MicroPython using the Thonny IDE. There is lot of Python editors available but Thonny is one of the Light weight (in terms of coding), beginner friendly editor tool, this tool is enough to program ESP32 with all your thought (ideas).
We will go from zero to Blinking LEDs, Connecting to Wi-Fi and may be even dreaming up your next smart gadget project. Here I assuming you know a bit of Python, but if you are new no need to worry, MicroPython REPL ( that is the interactive prompt) is like a normal conversation with microcontroller.
What is MicroPython?
In simple words MicroPython is a Light Weight version of Python 3 designed to run on Microcontrollers. It allows you to write simple python scripts and upload them directly to your microcontrollers, EP32, etc., It runs on devices with limited memory as low as 256 KB of flash and 16 KB of RAM. It supports cross platforms with Interactive REPL, It runs directly on hardware no need for separate operating system. Want to know more about https://micropython.org/
Tools Need to Get Started
- ESP32 Development Board ( Here we used DOIT Dev Kit V1)
- Micro USB Type B cable
- Computer
- Breadboard, Jumper wires, components (if you going further)
- Thonny IDE (installed on computer)
Lets begin to code ESP32 using MicroPython script.
Step 1 : Installing Thonny IDE
Just go to https://thonny.org/ website and download IDE depends on your operating system and install it. In case you are a Linux guy, then open a terminal and type.
sudo apt update
sudo apt install thonny
for other distros, check the website or use “pip: pip3 install thonny”.
Setting up Thonny IDE for ESP32
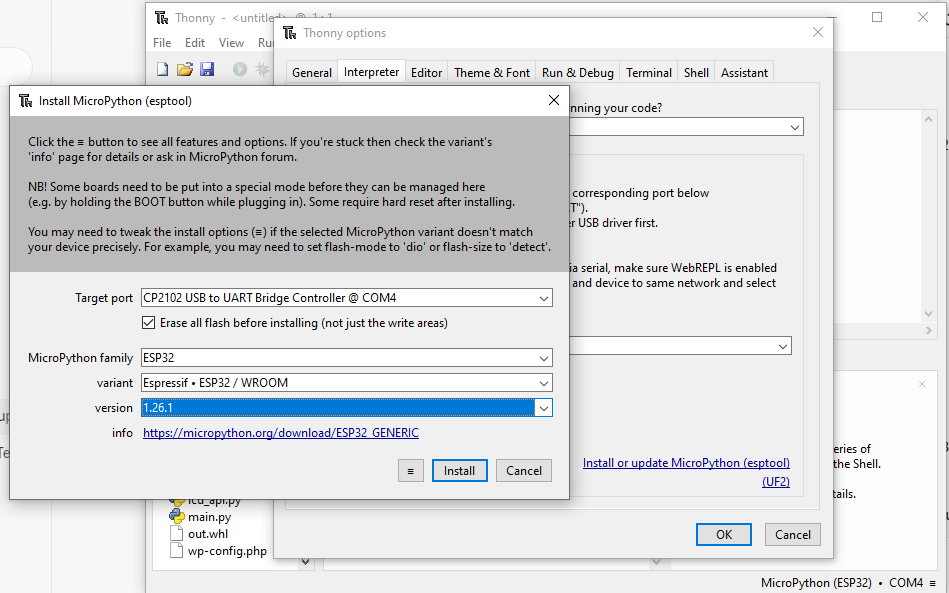
Just plug your ESP32 development board into your computer via USB and look for a blinking LED on ESP32 board to confirm its alive (some power LED stays ON) and then note down the connected USB port number. Open Interpreter ‘Run > Configure Interpreter’ or at the bottom right ( ≡ ) click and open Configure Interpreter.
- Choose MicroPython (ESP32) from the List.
- Thonny IDE might auto detect USB port of your ESP32 board, if not choose right one.

Step 2 : Flashing MicroPython to ESP32 Microcontroller
Your fresh ESP32 board don’t know about micropython code and script, so that we have to feed MicroPython firmware. We can do this via Thonny IDE. Thonny IDE can grab the firmware for you, if you want to know where it get or just want to download firmware head to https://micropython.org/download/ESP32_GENERIC/ ( If you want to do manually, just pick a stable build for your board).
- Now go to ‘Tools > Options > Interpreter’ or ‘Run > Configure Interpreter’ after that click Install or Update Micropython link.
- Choose Target Port ( the port you connected ESP32 board)
- Tick Erase all flash before Installing
- Choose micropython family as ESP32.
- Choose your board varient mostly “Espressif ESP32/WROOM”.
- Click Install
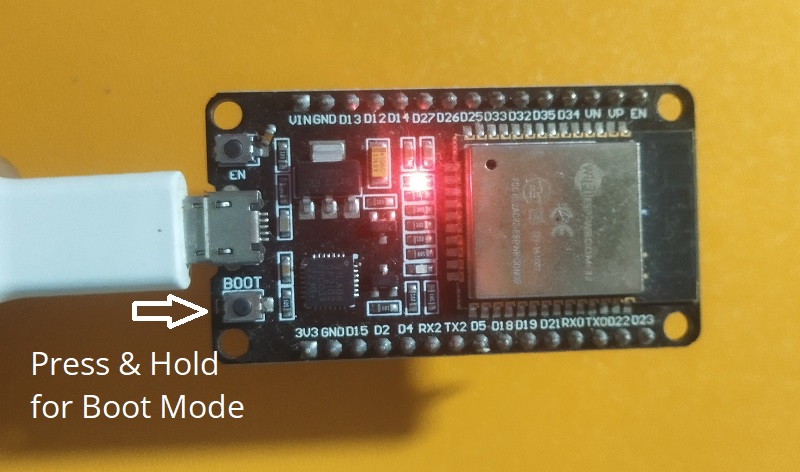
Thonny IDE will automatically download and install firmware on ESP32 microcontroller. Now your ESP32 microcontroller knows MicroPython language, and Shell shows some Information. If your port doesn’t connect properly then try boot loader mode by press and hold BOOT button on ESP32 board and Install micropython firmware.
Step 3 : Say Hi to ESP32 in REPL
Now you are in the REPL (Read Eval- Print Loop) MicroPython’s line coding sandbox, Thonny IDE shell prints what is happening.
Just try the command,
print("Yo, ESP32 is alive!")and hit Run, you will see Yo, ESP32 is alive! in shell, so the micropython runs on your chip.
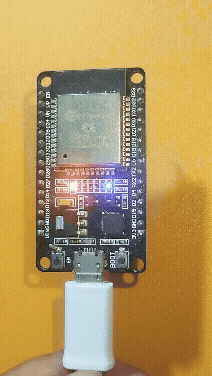
Step 4 : Blinking On board LED
Let’s give a micropython script to ESP32 to make blink on board LED (mostly connected in GPIO2),
# Code from firmdevice.com
# To Get started with Thonny IDE and ESP32 Board
from machine import Pin
import time  # for delay

led = Pin(2, Pin.OUT)  # GPIO2 as output

while True:
    led.value(1)   # Turn ON
    time.sleep(0.5)  # Wait 0.5 seconds
    led.value(0)   # Turn OFF
    time.sleep(0.5)  # Wait 0.5 seconds
Here is the output in ESP32 Development board,
If you want to run any script or code automatically on boot then you have to save the code as main.py or boot.py in microPython device.
Step 5 : Lets make ESP32 Web Server using MicroPython Code
Here we are going to upload a MicroPython script to ESP32 using Thonny IDE and get the ip address and see the output in browser, for this you need wi-fi connection and same wi-fi connected device. Input you wi-fi details before run the code.8
import network
import socket
from time import sleep
# Your Wi-Fi details
SSID = 'YourWiFiName'
PASSWORD = 'YourWiFiPassword'
# Connect to Wi-Fi
wlan = network.WLAN(network.STA_IF)
wlan.active(True)
wlan.connect(SSID, PASSWORD)
print("Connecting to Wi-Fi...")
while not wlan.isconnected():
print("Connecting...")
sleep(1)
ip = wlan.ifconfig()[0]
print("Wi-Fi Connected! firmdevice is working — IP:", ip)
# --- Simple Web Server ---
addr = socket.getaddrinfo('0.0.0.0', 80)[0][-1]
s = socket.socket()
s.bind(addr)
s.listen(1)
print("Web server running at: http://" + ip)
while True:
cl, addr = s.accept()
print('Client connected from', addr)
request = cl.recv(1024)
request = str(request)
print("Request:", request)
# HTTP response
html = f"""\
HTTP/1.1 200 OK
<!DOCTYPE html>
<html>
<head>
<title>firmdevice</title>
</head>
<body style="font-family:Arial; text-align:center; margin-top:50px;">
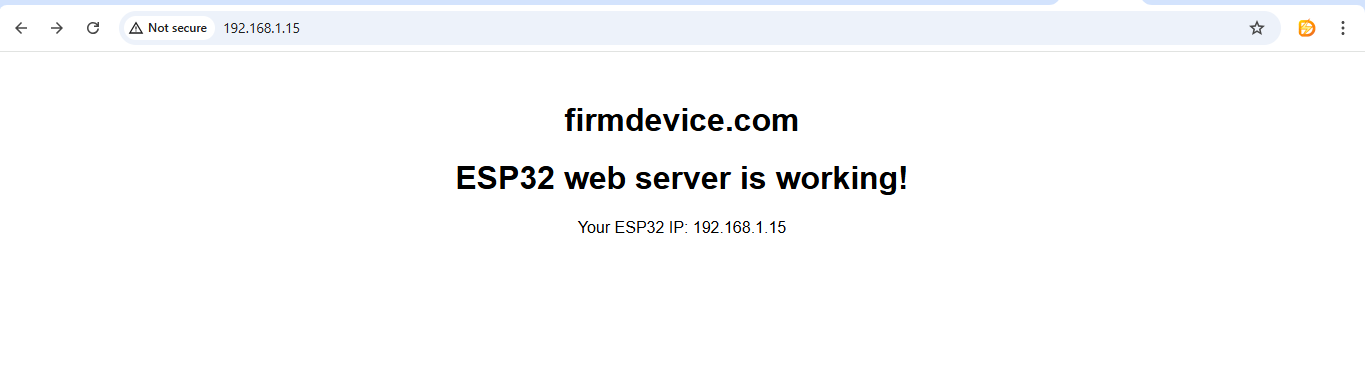
<h1>firmdevice.com</h1>
<h1>ESP32 web server is working!</h1>
<p>Your ESP32 IP: {ip}</p>
</body>
</html>
"""
cl.send(html)
cl.close()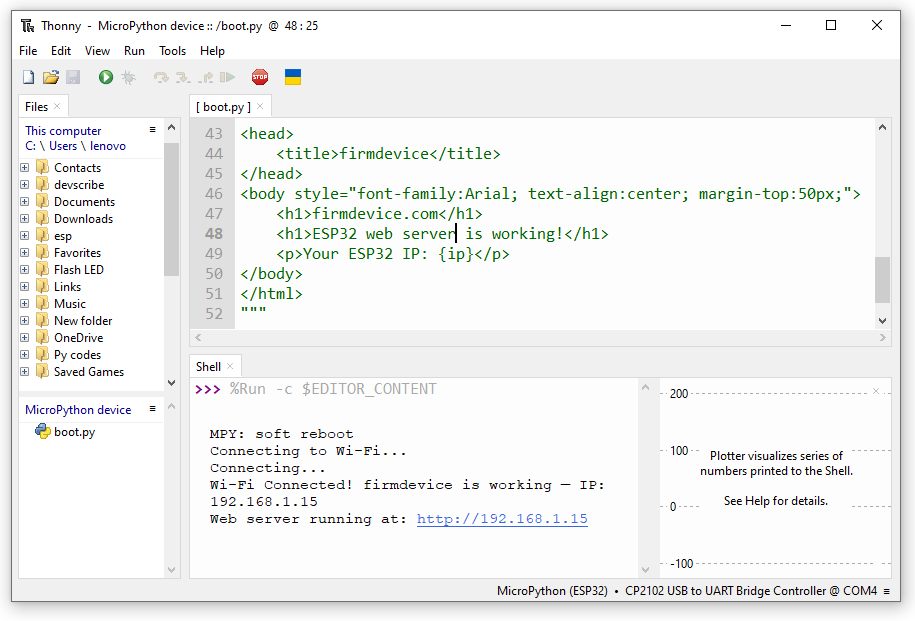
Output in the browser
Through this tutorial hope you have gone from a blank ESP32 to a blinking, internet connected mini machine expert. Between you and microcontroller Make microPython language as a tool to communicate and Thonny as medium, Comment your thoughts!